There are numerous USB Soundcard Adapter (FOB) modification methods shown on various web pages on the Internet for AllStar. My goal here was to make it as simple (KISS) as possible. There are two tricky connections for COS and PTT if you want to solder wires to the 48 Pin IC. (CM108 or CM119) Now for us older radio amateurs whose sight is impaired and even with magnification it is quite difficult to work on surface mount components if you do not have the correct tools. In the previous AllStar build I destroyed two CM108 units due to bad eyesight. Having build a Radioless AllStar Node I found a way around having to solder any wire to the 48 pin Sound IC for COS. I do not need PTT (Pin 13) as this unit uses a microphone to do the PTT.
I used the above 7 in 1 USB Soundcard Adapter. Please ensure you buy the good quality adapter and not the cheap imitation/clone adapter from China. My unit has decent push buttons (as can be seen in the photos below) and a color indication for MIC (yellow) and SPKR (green) where the clone is just black and has “metal spring buttons”. You can clearly see the different units in the photos below.
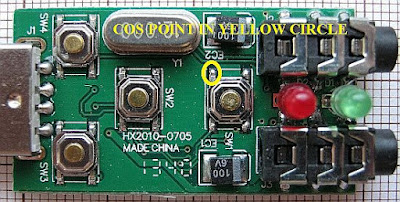
Now open the plastic casing by prying it open. Remove the board from the case. The case and plastic buttons can be discarded. It is nothing more than plastic and does not serve as any shielding. The case has to be removed anyway to allow soldering wires to the MIC and SPKR sockets. No I never remove the sockets, I just solder the wires to the top of the sockets. Once the PCB has been removed we will only de-solder the bottom (volume down) switch from the PCB. See photos below. Once carefully removed you will observe the 4 soldering points for the switch. With the USB plug pointing away from you and the MIC and SPKR inputs (openings) toward you we will solder the COS wire to the top right point of the 4 soldering point where the switch was mounted. Now how do I know that this is the COS point? I was lucky enough that the black epoxy blob of my unit was not covering all of pin 48. Using my multi-meter I tested several areas and found the correct point for the COS. Once this was discovered it was plain sailing and easy to solder a wire to the point for COS. I would suggest that you solder a BAT43 diode (covered with heat-shrinking tubing) inline to protect the 48 Pin IC from possible stray voltages, shorts etc.
I fired up the Radioless AllStar Node. The node worked as it should.
What is the big deal here? Well firstly the CM108 and CM119 generic units must be imported from overseas at an absorbent price. You have no guarantee that you will ever receive the parcel via SA Postal Services and if you do it can take two to three months to be delivered. The unit I modified is locally available at R89 a piece. Please note this will not work if you want to build a General AllStar Node that needs a connection to Pin13 of the 48 Pin IC for PTT. The "black epoxy" over the IC prohibits any soldering directly to the IC. However for a Radioless AllStar Node you now have a cheap solution that functions very well.
Finally: I really hope that several Radioless AllStar Nodes will see the light in South Africa using this cheap and easy modification. I will in a future topic post my version of the Radioless AllStar Node. If you do build a Radioless AllStar Node using this sound card adapter send me your photos of the build to be published on this Blog. Email: Click HERE.
Images: (Click on images for large view.)
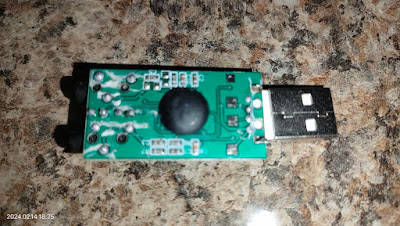
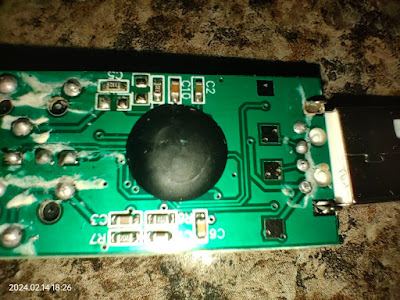
Cheap USB Soundcard Clone images below. I have not tested this unit to see if it will work!!


