Showing posts with label Raspberry Pi. Show all posts

Tuesday, July 15, 2025

Raspberry Pi and the Elements of Nature


Image:  Field used Raspberry Pi with completely dust covered PCB, rusted and grass-embedded RJ45 and HDMI sockets, and other debris. Real time clock module features cobwebs and more grass. Recently disconnected Ethernet plug and cable  ......  still working!

Friday, March 14, 2025

Let's fix the USB Ports of a Raspberry Pi Model B+ V1.2 (2014)


Image:  Raspberry Pi Model B+ V1.2 (2014)  (Click on image for larger view.)

I own a Raspberry Pi Model B+ V1.2 manufactured in 2014.  In 2024 I noticed that if I plug a USB Sound Card Adapter in any of the ports it would not recognize the adapter.  None of the four USB Ports were working! I noticed that the green led was blinking and that component U13, gets abnormally hot.  The Ethernet port is working fine.  U13 was identified as a AP2553 a single channel precision adjustable current-limited switch.  I needed to find a solution or the PI would become a static ornament against the wall in my shack.   After searching the Internet I had the following options to solve the issue:

1.  Replace the "faulty"  AP2553 with a new one.

2.  Modify (bypass) the AP2553 to solve the problem.

3.  Check the Power Supply that it puts out enough voltage and amps.

4.  Check capacitor C97 and if faulty replace it.

Well you guess correctly I started fault finding with the easiest option to check capacitor C97.  I used a multi-meter.  While the Pi is Off, try using the buzzer of the multi-meter and check the 2 pins of C97. If you hear the beep sound then the problem is with the capacitor, remove it from the PCB and check it again.  If it beep again then C97 is toast.  This was the case with capacitor C97 in my Pi. The next step was to check the voltage and amps of the power supply.  It was more than adequate and there was no red flickering led or messages that there is a power problem.  I then decided to first check if removing C97 solved my USB issue.  Low and behold the USB ports came back to life after removing C97.  Thankfully the AP2553 was not damaged and all four USB ports are now working again.  I need not replace the AP2553 or do the bypass modification to solve my issue.  I will install a new capacitor at C97 and hopefully use this Raspberry Pi still for many years to come.

Herewith the links I used:  

1.  https://forums.raspberrypi.com/viewtopic.php?t=110164

2.  https://forums.raspberrypi.com/viewtopic.php?f=28&t=162103

Images:  (Click on images for larger view.)


Tuesday, March 11, 2025

NEW - Emergency VHF RF Radio Link installed via the Aasvoëlkop Repeater in the Southern Cape


Image:  Flow Chart RF Radio Link  (Click on image for larger view.)

For a while now I have been thinking about a KISS method to link the Aasvoëlkop Repeater near Albertinia to the ZS-HUB in Mossel Bay when the Internet is down due to loadshedding or any other outage.  Instead of complaining or sitting around waiting for the re-connection of  links when the Internet is down I decided to establish a VHF RF Radio Link to the Aasvoëlkop Repeater near Albertinia.  This link is not a replacement for any other Internet connected links to the Aasvoëlkop Repeater but will serve as an emergency radio link.  We must remember that when the Internet is down Echolink will also fail but this is not the case with AllStar.  Although we still lose long distance link connections when the Internet is down, AllStar will still be functional locally.  We use to lose all connections to the Aasvoëlkop Repeater during Internet outages.  This left many stations in the cold until the Internet connections are re-established.  This will not be the case anymore.  

The establishing of the VHF RF Radio Link in Mossel Bay has the following advantages and disadvantages:

Advantages:

1.  During Power or Internet outages we will still have a fully functional connection to the Aasvoëlkop Repeater.

2.  The RF Link provides a wider coverage area in the Southern Cape.  We can now reach areas in  Mossel Bay that previously did not have repeater coverage due to topographic obstacles.

3.  The RF Link can now be used by radio amateurs who previously had marginal access to the repeater with scratchy or "rain" on their TX or RX signal.

4.  The RF Link is using the KISS method.  It is simple and easy to use the link and you have two ways to access the Link.

5.  No extra equipment was needed to setup the VHF RF Radio Link.  The current ZS1I 145.550 Mhz RF Link equipment was used.  Software changes however had to be made.

6.  With the press of a button I can change to either the ZS1I 145.550 Mhz RF Link or the 145.625 Mhz Aasvoëlkop Repeater RF Link.  

7.  It will be quite simple to add a UHF RF Radio Link to the current setup if there is a need for such a link.

8.  Radio Amateurs can now use lower radio power output to excess the Aasvoëlkop Repeater through the VHF RF Radio Link.

9.  All the other broadcasting options is still available as before using the KISS method.  I did however disconnect telemetry and courtesy tone options to prevent the Ping-Pong effect between the repeater and the RF link.

10.  You will not hear the Aasvoëlkop repeater "tail" on the RF Radio Link.  I setup AllStar to eliminate the repeaters squelch tail.

11.  There is very little latency if any between the ZS1I HUB and the Aasvoëlkop Repeater.  However there will still be latency issues if connected to the other nodes when the Internet is up and running.

12.  The RF Link is open for use by any radio amateur.  Please note that although there is no indication on AllStar or Echolink that the link is active, the only way is to put out a call on the HUB, 145.625 Mhz or the DMR Bridge.  I am currently looking at a possible announcement when the RF link is active.

Disadvantages:

1.  Not all areas in the Southern Cape will be covered by the VHF RF Radio Link as is the case with any repeater.

2.  Certain telemetry announcements will not be active when the RF link is active.

3.  This VHF RF Radio Link is working but it is not the most ideal way to setup a direct RF Radio Link.  Obviously the most ideal situation would be to have an AllStar Node and Internet connection at the repeater site, but due to road and terrain access issues this is not possible.

4.  This VHF RF Radio Link will not be active 24/7.  It will only be available during Emergencies, Internet Outages,  Power Failures and when the need arise to use the link for some kind of event or purpose.

5.  Currently there is no method to remotely disconnect the link via DTMF, or Wi-Fi.  I am working on a solution in this regard.  Update to follow soon.


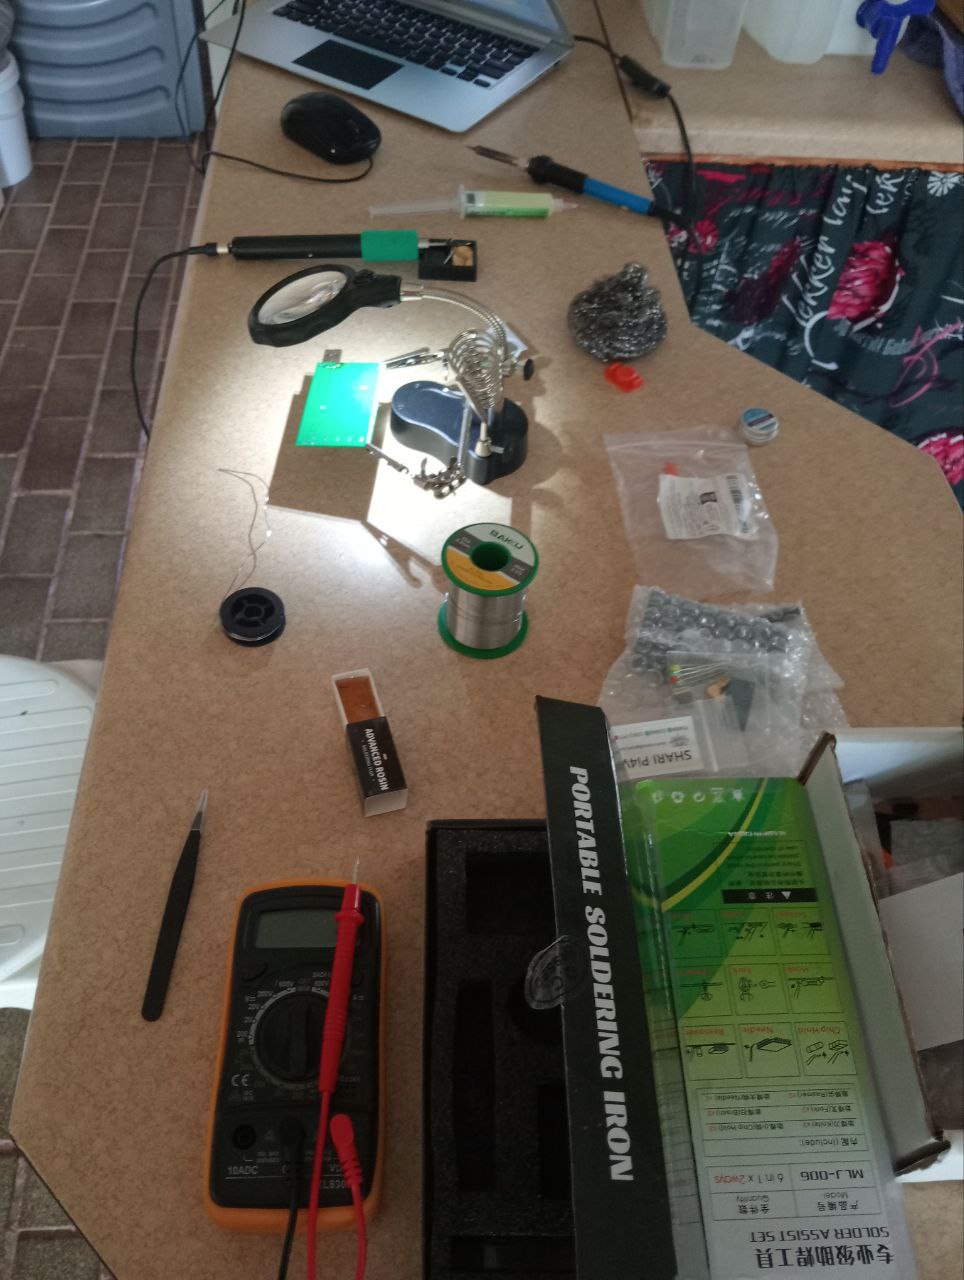
Image:  RF Radio Link and backup power (Click on image for large view.)

How do I use the Aasvoelkop RF Radio Link?

Using the RF Radio Link to the repeater becomes nothing more than a normal user of the repeater.  You use the RF Radio Link as you would when you use the Aasvoëlkop repeater.  You use your radio to transmit and receive as if the RF Radio Link is the repeater.  Option 1 underneath is the frequencies you use.

Refer to the SCP ZS-Link Network Flow Chart above to get a clearer understanding.

We need to make a few minor changes to our HT, Mobile or Base Station radio frequencies.  Lets first look at the frequencies used by the repeater and then to frequencies use by radio amateurs that would like to access the Aasvoëlkop Repeater.

Aasvoelkop Repeater Frequencies

RX = 145.625 Mhz  88.5 Hz CTCSS
TX = 145.025 Mhz 88.5 Hz CTCSS
 
Radio User (Option 1):  Radio Frequencies (Program these frequencies in your HT, Mobile or Base Station radios)
 
RX = 145.625 Mhz  88.5 Hz CTCSS
TX = 145.025 Mhz 88.5 Hz CTCSS
 
Radio User (Option 2):  Radio Frequencies (Program these frequencies in your HT, Mobile or Base Station radios)
 
RX = 145.025 Mhz  88.5 Hz CTCSS
TX = 145.625 Mhz 88.5 Hz CTCSS
 
Note:  Option 2 must only be used if you are in reach of the ZS1I QTH / Tower. To setup CTCSS refer to your radio's users manual.
 
For those who would like to setup a VHF RF Radio Link to a repeater, this is how I did it.
 
I am not going to explain how to setup/connect the AllStar software and radio hardware using a Raspberry Pi and a Motorola Radio. Google and YouTube are your friends here.  From here-on I will provide the changes I made to some AllStar files to get the link to work properly.

Important Note:  I used the HAMVOIP Firmware.  I do not know if the ASL3 Firmware will work to setup a remote RF link.  A Motorola Radios M100  is used as the link radio.
 

Image:  AllStar Admin Menu List  (Click on image for larger view.)
 

Image:  simpleusb-tune-menu  (Click on image for larger view.)

ALLSTAR Settings / Changes:
 
1.  Simple-Tune-Menu Settings
 
Log in via Putty or MobiXterm
In the Admin Menu List go down to Run simpleusb-tune-menu Application
Click on it.
Simpleusb-tune-menu will open
Go down to M) Change RXONDELAY value (currently "-100")
Enter M and set this value to -100
 
Rxondelay delays the valid COS signal and is used to stop cyclic keying or ping-pong which can sometime happen.  If you bring up simpleusb-tune-menu and select the "V" view mode.  You can see both the COS input and COS composite displays.  To understand how rxondelay works set it to some high value like 20 or 400ms.  When you transmit to your node you will see the COS input immediately go keyed and the 400ms delay of the composite.  Setting this value to high would cutoff the beginning of a transmission as it delays the actual COS beyond the real COS signal.  The default is 0 and this would be appropriate in most all cases except in the case of the Aasvoëlkop Repeater with a fairly long squelch tail.  In my case -100 did the trick. 
 
After entering the value go to N) Change RXAUDIODELAY value (currently "10")
Enter N and set this value to 10

Rxaudiodelay is primarily used for squelch tail elimination. It delays the audio in a buffer so that a drop of COS can cutoff a portion of the audio before the COS drops thus eliminating the tail of the transmission where a squelch crash would take place. Since all radios are different this value is adjustable. Valid values are from 0-24 in 20ms increments. Typical values in most cases would range from 5-10 or 100-200 ms. If is obviously not mandatory to use this, some people actually like squelch tails. The default is 0. If you have a way to monitor your node through another node or maybe iaxrpt you can listen when you drop TX on the node you want to adjust and move this value up until the tail is gone. Unless the tail is unusually long you should be able to eliminate it.

Now lets write the changes to the simpleusb.conf
Select W) Write (Save) Current Parameter Values
Enter
When "please enter your selection now appears" select 0 Exit Menu and Enter
Settings in the menu is now complete.
 

Image:  rpt.conf file (Click on image for larger view.)

2.  Repeater / Simplex Settings (rpt.conf)

Go back to the Admin Menu List screen
Select 9  Start Bash Shell interface
Enter
# cd /etc/asterisk
Enter
[root@allnode asterisk]# sudo nano rpt.conf 
Enter

Go to Repeater / Simplex Node Settings
Look for duplex = 1
Change the 1 to 0
duplex 0

This means half duplex with no telemetry tones or hang time. Special Case: Full duplex if linktolink is set to yes. This mode is preferred when interfacing with an external multiport repeater controller.

We are done!
Press Ctrl +X
Yes
Enter 
 
Changes will now be saved
Restart Asterisk Server in Admin Menu List
 

Image:  rpt.config file - turn off connect and disconnect announcements.
 
Time to turn off link connect and disconnect announcements
 
When running a link network we need to turn off those ridiculous connect and disconnect announcements which can last a long time and also interrupt the use of the link system.
 
The following commands need to be edited to get rid of the annoying connect/disconnect telemetry messages.

Go back to the Admin Menu List screen
Select 9  Start Bash Shell interface
Enter
# cd /etc/asterisk
Enter
[root@allnode asterisk]# sudo nano rpt.conf
Enter

Now look for:

holdofftelem=1  (Disable courtesy tones) ( 0 = default, 1=Disable)
telemdefault=0  (Do not make announcements)

; 0=voice telemetry off
; 1=voice telemetry on
; 2=only your telemetry actions

Press Ctrl +X
Yes
Enter
 
Changes will now be saved
Restart Asterisk Server in Admin Menu List
 
Your RF Radio Link will now be up and running!

Now back to the SCP VHF RF Radio Link.  Whow what a name for a single rf radio link but we need to differentiate between the links running in this area on the ZS Link Network.
 
Summary:
 
1.  The link is currently active on a test basis daily from 08h30 to 16h25 until further notice.
2.  The link will not be active 24/7 in the future.
3.  This link will be active during Emergencies,  Internet and Power outages.
4.  This link is not a substitute for any of the other links currently active in the Southern Cape Area.
5.  If you get no response on the ZS1I 145.550 Mhz RF Link then switch to the 145.625 Mhz Aasvoëlkop Repeater RF Link and call.
6.  Updates to follow in a future posting regarding the working and feedback relating to the RF Radio Link.

Finally: 
 
Enjoy using the Aasvoëlkop VHF RF Radio Link another valued addition to the SCP Link Network, brought to you by the Southern Cape Link Network Group.

Friday, February 21, 2025

Zayn ZR3VO builds a new SHARI PiHat Hotspot for AllStar and Echolink


About a month ago Zayn ZR3VO of Orania decided to put his SHARI HAT together for the Raspberry Pi. Now what is the SHARI PI HAT?

A "Shari PiHat" is a small, self-contained radio interface board designed for amateur radio enthusiasts. 

The SHARI PiHat, developed by folks like N8AR (a known name in the ham community), is a plug-and-play solution for turning a Raspberry Pi into an Allstar node. Allstar, short for Allstar Link, is a VoIP system that connects amateur radio operators worldwide using software like Asterisk. The SHARI PiHat uses the SA818 radio module—a low-cost, embedded VHF/UHF transceiver—combined with a custom circuit board that fits onto the Raspberry Pi’s GPIO pins (hence "PiHat").

Here’s a quick rundown:

Versions: You can get it in VHF (144-148 MHz) or UHF (420-450 MHz), depending on your radio band preference.

Setup: Mount it on a Raspberry Pi, connect an antenna (it often comes with a basic one), plug in a USB cable for audio and power, and load software like HamVoIP (a popular Allstar image for Raspberry Pi).

Function: Once configured, it acts as a simplex node—transmitting and receiving on a single frequency—letting you connect to other nodes or repeaters on the Allstar network.

Power: It’s low-power (around 1 watt), so it’s best for local use or as a hotspot with limited range unless paired with an amplifier.

Construction:  Often sold as a kit, requiring some basic electronics assembly to solder components onto a printed circuit board.

Allstar Network:  To function, the Raspberry Pi needs to be loaded with Allstar software, which enables communication with other Allstar nodes on the network. 

Radio Amateurs use it for things like portable radio nodes, emergency communications, or just experimenting with digital ham radio. It’s DIY-friendly but requires some basic config—like setting your call sign and node number in the software.

I am not going to go into detail about the construction here as the images and video is self explanatory and you can find the complete construction manual by clicking HERE. 

Images:  (Click on images for larger view.)


Tuesday, November 5, 2024

How I make a backup copy of an SDCard using Raspberry Pi OS


Switch on the Raspberry PI and let it boot.
Plug in a USB Hub Extender into one of the Raspberry Pi USB Ports
You need to know the name of the 2 x USB SD Card Readers you are going to use.

USB SD Card Reader  No 1 = Green FNK TECH  0100 Card Reader
USB SD Card Reader  No 2 = White Super Top Micro SD Card Reader

Now plug the No 1 Green card reader into the USB Hub Extender.
Type lsusb enter
Card will be listed as FNK TECH  0100 Card Reader
Remove the card reader from the USB Hub Extender
Now plug the No 2 White card reader into the USB Hub Extender.
Type lsusb enter
Card will be listed as Super Top MicroSD Card Reader
Remove the card reader from the USB Hub Extender
We now know the names of the 2 x USB SD Card Readers
This will help to prevent mishaps when you make a backup copy of a card.
One can easily select the wrong cards when copying on to the other.

Ensure that you have a “clean” new SD Card to which you want to copy to.
I format the new card with SD Card Formatter in Windows with one of the card reader.
I select which card to format and then add the Volume Label  Example:  svxlink bu
Once added you can now format the card.
Remove and keep the card and reader at hand.
First we going to plug in the Green SD Card Reader into the USB Hub Extender that is connected
to the Raspberry Pi.
Now go to Accessories and click on SD Card Copier
SD Card Copier window will open displaying:

Copy from Device
Copy to Device

Click on the down arrow of the Copy from Device and FNK Tech 0100 Card Reader (dev/sda) will be listed.  Select it.
Now add the White SD Card Reader into the USB Hub Extender that is connected to the PI
Click on the down arrow of the Copy to Device and Mass Storage Device (dev/sdb) will be listed
Select it.  Leave other settings as is.
Click on Start and the copy process will start.
Green SD Card Reader LED will flicker and partition 1 will be copied.  Later partition 2 will be copied.
Once the process is finish a screen will appear to say that copy has been finalized.
Click OK
Eject both SD Card Readers
You now have 2 x SD Cards.  One backup and one for use.

Store the backup in a safe place and do not forget to label it so that you know what is on the card.
This backup process will save you a lot of time and frustration in the event of a corrupted or error card etc.

Enjoy!!


Sunday, September 22, 2024

A Cheap Switch Mode Power Supply Alternative ....... but BEWARE!!

With a few modifications and two additional resistors you are able to modify an old AT or ATX PC switch mode power supply unit to a stabilized 13.8 or 5v Volts / 20 Amps power supply.

WARNING: There are high voltages inside the housing, which can be lethal. Before opening the housing of the PC Switch Mode Power Supply unplug the power cable and turn off the switch on the back. Discharge the capacitors of the power supply by attaching a 100 ohm resistor between a black and red wire on the output side. However the high voltage capacitors on the input side can be still charged. The best way to discharge all capacitors is by letting the power supply sit unconnected for a few days. PLEASE NOTE: You do all modifications at your own risk!! I will not be held responsible for any mishaps, lethal shocks or damaged equipment by using the modified power supply. You have been WARNED!!

Now I am not going to "re-invent the wheel" here as there are many articles and videos that explain how one can modify a PC Switch Mode Power Supply for various uses.  I will however provide a pictorial view of how I modified a power supply to 5 volt DC 15 Amps.  I will also provide information about the spectacular end result of the modified power supply.

In the event that you would like to know more about the modifications,  I provide the following two links for further reading:

1.  A Cheap Power Supply - The "St. Louis Switcher" by Matt Kastiger N0XEU

2.  Building the "St Louis Switcher"  by George Heron N2APB

Download articles HERE

Compliments Radio ZS  March / April 2003

Construction:

The construction went well but I was doubtful if the used 2002 power supply was still in good conditions.  Time will tell!!

After all the modifications were made it was time to switch the power supply on, place a load on it and see if magic smoke escape.  First I did not put a load on the supply.  Well it switched on and no smoke escaped.  There was also no load on the output.  Using different 10 Watt resistors I started to test the load.  I increased the load as I went along testing the unit.  At 10 - 15 Amps the power supply was still happy even though it started to get rather hot.  The next test was rather ambitious.  I installed a resistor that drew 33  Amps for about 30 seconds.  Still no smoke and I decided not to push it any further.  The modified supply was working great.  I removed all the resistors switched the supply off.  After a while I switched the supply on with no load.  An instant "bang" was heard with the dreaded magic smoke coming out. I opened the supply but could not see where the smoke emanated from.  After unscrewing the PCB from the housing I saw that a PCB track was burned and the housing had a black burned mark on it.  Well being lazy I decided to "fix" the burned track by bridging it with a piece of copper wire.  Well this sloppy/silly fix resulted in a real Guy Fawkes display.  High voltage arc's running between the transformers and high voltage capacitors, clapping and booming so much so that my YL asked what am I doing in the Shack.  Funny it took quite a while before the original fuse blew.   Upon further investigation afterwards I found that there might have been a short created from the PCB track to the metal housing.  How I do not know.  Before starting the modifications I also found three electrolytic capacitors with broken safety valves on the top.  This must be replaced before final testing.  Moral of the story this power supply unit was not a good candidate to modify.  It was old and had an issue or two that resulted in it going silent key.  Some years ago I modified an old XT power supply which is still running flawlessly today.  

End result:  Rather look for a good condition PC switch mode power supply before commencing with any modifications.  Scratching in my junk room I found a next to new PC power supply which I am keeping for a spare for my desktop computers.  So I was not willing to modify it.  Scratching more I ran into the ideal 5v Switch Mode Power Supply (See photo.)  I forgot about this supply which was salvaged from a instrument that used 5v 20 Amps.  Now this find solved the need to modify any other PC power supply.  

Finally:  I had great fun with this project, However the danger that lies buried in a PC Switch Mode Power Supply was clearly demonstrated by this old supply.  Thankfully I applied all the safety measures in modifying the supply with only the supply going SK and not me.

Images  (Click on images for larger view.)


Sunday, September 15, 2024

RAE Candidates and OpenWebRx+ (Part 1)


Image:  ZS Link OpenWebRx Radio Receiver Location.  Click on image for larger view.

I recently exchanged some cash for a Raspberry Pi 4 and a RTL-SDR Blog Model V4 SDR Receiver plus a few odds and ends.  I do have a few Raspberry Pi's and a RTL-SDR RTL2832U E4000 SDR Receiver.  More info on the latter SDR is available HERE.

Now why the title "RAE Candidates and OpenWebRX+"

Please read on and you will find out!

I have always been a fan of WebSDR and decided that the time has arrived to play around and see if I can come up with something useful while using a Raspberry Pi and SDR Receiver.  In my point a view it is good that you can "play" around with SDR Receivers but why not put them to good use by rendering a service to RAE Candidates and Members of the Public.  I listen regularly to the QO-100 WebSDR available HERE. 

One morning at 03h00 I came up with the following idea.  Why not setting up an OpenWebRx Radio Receiver that can be used by RAE Candidates.  I hear many say but are you stupid or what?  Candidates can use real radio receivers to listen to licensed radio amateurs talking.  In many cases some candidates possess a Amateur Radio Listeners License and the necessary equipment.  Yes,  I know this but I am talking about those that do not have such a license or any radio equipment at all.  You might not know but there are also RAE Candidates that cannot afford to buy equipment after they received their license.  This might be one of the reasons why some write the examination and just "vanish".  Bear in mind that not every candidate are in the privileged position to have  a club or radio amateur close by that he or she can visit.  In my region the above mentioned has been experienced and I decided that something must be done for those RAE Candidates.

Another "problem" that we experience is that some RAE Candidates have to wait up to a month and longer before receiving their amateur radio licenses from ICASA.  This prevents them for registering for Echolink / AllStar /DMR etc. To bridge that waiting time and to "keep the fires burning" and to prevent candidates from "vanishing", I decided to setup an experimental OpenWebRX+  Radio Receiver where these candidates can listen to the 145.625 Mhz Aasvoelkop Repeater in the Southern Cape.  The receiver currently covers the following 2 Meter band section -  144.0 Mhz to 146.0 Mhz Band over a large period of the Southern Cape. 

PLEASE NOTE:  The WebSDR is not yet permanently in full time operation. It is currently still in an experimental phase. On Sunday, 15 September 2024 the receiver was activated to test the equipment during the broadcasting of several amateur radio bulletins.  Several reports were received and clients  observed utilizing the ZS Link OpenWebRx Radio Receiver.

Reports and comments were received from:  ZS6CMO, ZS5KDK, ZR2GW, ZS1TBP, ZS1AAC, ZS1RP, ZS1IB, ZS1SSM, ZS1NS en ZS1KLO.

Many thanks to the above radio amateurs and also to the "unknown" clients that visited the site.

Is this the end of the road?  No definitely not.  Bear with me. I do have a few other surprises up my sleeve.   As indicated  the radio receiver will not yet be operational on a full time basis as I need to make several hardware changes.  Once the changes have been made I will open the ZS Link OpenWebRx Radio Receiver for full time, general use.

Herewith the links to the radio receiver and also a short manual how to operate the radio receiver:

ZS Link SDR RX -  Click HERE   

ZS Link SDR RX -  Aasvoelkop Repeater - Click HERE  

ZS Link SDR RX Starting Manual - Click HERE

Finally:  This project is still under construction.   More information will be made available as the project progresses.

Images:  (Click on images for larger view.)


New ZS6CM0 70cm AllStarLink Repeater - Alberton

(Click on images for larger view.) Curtis ZS6CMO recently completed his 70cm AllStarLink Repeater.  In the video the repeater was connected ...