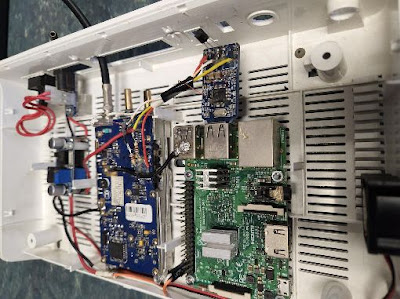
Allstar is about using a small radio, Sound card (modified), Raspberry Pi and some kind of Voltage regulator to control 12V for different Items.
You also need an Allstar Node for your system
I was inspired by ZS1I (Johan) the first time I spoke to him via the Echolink from my mobile on how good the sound quality is!
Start google the internet i quickly find a place to start with
What i had in my Shack:
Raspberry Pi 3
Zartek ZA708 handheld radio
USB Sound card CM108
Bug converter (power)
The most intensive part was to modify the sound card. This is just because it is such small items to work with and the solder gun. (This is not for elderly people) Beweraskies!!!
Steps
Setup the radio with the frequency (legal within the spectrum)
I have programmed all 8 channels with the same simplex Freq (433.650) you can add a tone as well.
Setup the bug converter
7.4 volts for the Zartek radio
5 volt for the Raspberry pi
Mod the USB Sound Card and add cables that will connect to radio.
With this all done it is now time to package this in a container.
I used one on my Redundant Routers to house all the components.
Mount the Bug converters (i use two converters but you could get away by adding some diodes to bring down the voltage to 7.4 vols for the radio.
Mount the radio and attach the cables from the Sound card
Four leads
PTT
TX
RX
COS
I also scratch around for some kind of cooling and found a small fan (old DSTV Box) and fit it to the casing
After setting up the station, i calibrate the Sound with the Build-in Application for Allstar.
Below is pictures of the project:


