This project is a follow up on "
Beat the Eskom Loadshedding Blues with this DIY Internet Router UPS Project. (Ver. 1)" available
HEREThe Ver.1 UPS has been in operation since October 2022. I am
very happy with the performance of the Internet Router UPS. So far it
is working as I would like it to work for my setup. That is until the 3S Battery Pack decided that it had enough of this charging and discharging when Stage 6 is implemented. It could not handle the load and abuse during Stage 6 events. Remember the batteries used in the 3S were salvaged from a very old laptop of which the lifetime was already over. That 3S battery lasted this long was a bonus.
The ever worsening
of load shedding in South Africa and the work-from-home policy for
business continuity resulted in the DIY Internet Router UPS Project.
Working from home means your home's WiFi networks are more important
than ever especially during periods of load shedding. Anyone with a
fiber-line connection will know that their Internet connection drops
whenever the power goes out. It is annoying if you are in an important
meeting/webinar or just browsing the Internet and there is an
interruption due to load shedding.
I had three options:
1. Using a conventional UPS ( Bulky and Costly )
2. Use the Mini-UPS Project Ver. 1 ( Just replace the 3S Battery Pack and I am on my way)
3. Construct a new Internet Router UPS Ver. 2 (Use all new components and a Gel Battery)
You
guessed correctly I decided to build an all new Internet Router UPS Ver.2. As my eyesight is not all that great anymore I again opted to buy modules and join them together for this project. Google is your friend as
you can find a variety of UPS projects that will serve your needs.
Once again this is an ugly constructed project. I used what I had on hand. The PVC front and back cover was rolled from a 300mm PVC down pipe. I cut a piece of the pipe in the length, heated it with a heat gun and press it flat between two laminated planks. Works great and cost nothing. Can be scrounged from a dumpster.
However it
works great and the reason for the ugly construction is that I needed
the unit ASAP and there was no time to 3D print a nice looking cabinet
for the project. Ordering an ABS case was also not a option. I needed
the project as in yesterday.
I am
not going to go into full detail as this unit is available on many
sites with full instructions and photos. I did however changed the
circuitry to my liking and needs. Here are the features of the unit
that I constructed:
1. Automatic Switching ( using a Mosfet IRF 9540 ) between the battery charger
and battery pack during a power outage. More info available in the schematic diagram under images.
2. Two Output Ports:
12V / 3A and 5V / 3A (Voltage and Amps can be changed by turning the pots on the modules)
3. 10 hours of backup time
4. Battery pack with a Gel Rechargeable Battery 12v 12aH
5. Additional
Protection via 1N5821 Diodes
6. Additional Filtering via the power modules
7. Fuses on both the Battery Charger and UPS
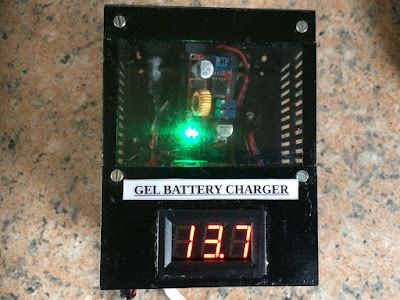
8. Battery over and under voltage charging protection via YX-1708 Module
9. Battery Charger Voltage and Amps can be changed by turning the pots on the XL4015 charger module. High efficiency up to 96%. Built in thermal shutdown- and short circuit protection function. Voltage 1.25 - 36 VDC adjustable. Output current 0-5 Amps.
Finally:
I enjoyed constructing this project. It is currently on test and I
will update this post once I am happy that the unit functions as it
should. Provisional tests were successful, however I would like to see
what it will do with stage 4 or 6 load shedding before I can really comment further.
PROJECT IMAGES (Click on images for larger view.)


