Monday, October 28, 2024

Did you fail the Radio Amateur Examination (RAE)? Never give up!!


With all the results of the recent Radio Amateur Examination (RAE) now available there might be some who did not pass the RAE.  This is nothing new as it is something that occurs in life whether it is at school, college or university.  While others celebrate there are those who might be sad and feel that they are a failure or that they did not study hard enough. Be as it may this happens in the best of families but everything is not lost.  You can and should write the RAE again in May 2025.  The latter part of the title of this article say it all:  "Never Give Up!!"

Why should one not give up in becoming an amateur radio operator?  Well I can provide you with many reasons here but I would rather like to tell you a story as an encouragement to write the RAE again and if necessary again and again.

More than 30 years ago I met Chris a 74 year old real gentleman in the town that I was living in at that stage.  I was always interested in radio and saw a large tower and antenna about 3 km away from my home.  One day I decided to visit this radio operator by knocking on his front door.  I introduced myself and the first thing he asked me if I was from the Post Office Inspectorate.  See in those days  the Post Office was the authoritative body responsible for citizens band, commercial and amateur radio.  Some citizens band (CB) operators used high power amplifiers and was then visited by the  Post Office Inspectors which resulted in confiscating such equipment or issuing of a fine.  Need I explain why he asked me if I was from the Post Office Inspectorate?

I told Chris no I am not from the Post Office and that I am just interested in radio and thought that he will be able to tell me more about his station, tower and antenna.  With the ice broken the rest was history and I need not tell you that I become a CB operator.  But this is not the crux of the matter.  One day Chris visited me and he brought a blue book with him.  (See top image)  He informed me that we are both going to become radio amateurs.  I was not very keen on the idea and he could see that on my facial expressions.  He said that he is 74 years old and that he is going to write the RAE and that it will be a shame if a 74 year old can pass the examination and that I (much younger than him) am not willing to except a challenge from an old man.

After we had a cup of coffee Chris left and my brain started to go haywire about this idea.  Well need I say that Chris wrote the examination but unfortunately failed the technical paper.  I did not even try to write the examination.  Chris told me he is not going to give up and that he will again write the examination the next time around. He wrote again and failed again.  I still did not even try to study the blue book.  Eventually I was transferred to another town but we kept contact.  One day Chris phoned me and he informed me that he was going to write the RAE for the third time.  Well he passed both papers and did well.  I was informed accordingly and the determination of Chris convinced me to write the examination the next time around.  I passed first time and Chris was in another world.  Unfortunately we were never able to make contact via HF as Chris went silent key after open hart surgery.


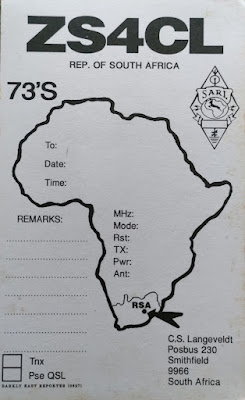
I dedicated my first HF contact to Chris Langeveldt ZS4CL (SK) (CB Handle:  Mazda) and left my first entry in my HF Log Book empty with a note in the remarks column that this first contact is dedicated to the man that challenged me to became a radio amateur.  I later managed to receive and empty QSL card (see image above) from his XYL Tant Annie (CB Handle:  Silver Draadjie).

May this short real story encourage those who did not pass the RAE this time around to write the examination again and if necessary a third and even a fourth time.  Never Give Up on your dream to become an Amateur Radio Operator does not matter how old you are.  I can guarantee you that amateur radio will change your life.  Remember  no where in this world will you find another diverse hobby like amateur radio. 

We as radio amateurs would like to welcome you to the best hobby in the world.  We enjoy attracting more people, from across our differences, to our common passion for radio? To those who have just passed the RAE be radio active! Be the connector that grows the hobby! And if you have a friend who is not a radio amateur or did not pass the exam the first time around,  invite and encourage him to write the RAE again to become an active radio amateur.

Remember:  Never Give Up!!

Saturday, October 26, 2024

Congratulations to all the candidates that wrote and passed the Oct 2024 RAE Examination!!


As per the above title I would like to congratulate all the RAE candidates on passing the RAE, They wrote the examination last Saturday (19 October 2024).  A special word of welcome to every new radio amateur and I trust that every single one that passed will be and active radio amateur for the rest of his lifetime on this planet.  We as "older" radio amateurs would like to take this opportunity to share our knowledge that we gathered throughout the years. Let's be realistic there will by experienced radio amateurs that might not share their knowledge but they are definitely far and in between. There are also a few "soar plums" around.  Please ignore them and find a friendly helpful radio amateur.  The only thing that you must do is to ask questions on the airwaves, and NOT social media as we would like others to also learn from you questions.  After all we talk about amateur radio here and NOT social media!  If you do not ask questions you will not gain the knowledge of experience radio amateurs. Yes, there is Google, YouTube etc. but they do not always explain the "nitty gritty" and definitely not the way experience radio amateurs will personally assist you with any problems you might experience in your amateur radio career.  The worst thing you can do is to "disappear" after you wrote the RAE.  Please get into the swing of things as soon as possible!!

The following candidates passed the RAE in the Southern Cape Area:

1. Jacobus ZS1JDJ

2.  Vivian  ZS1VIV

3.  Jacub ZS1KUB

4.  Matthys ZU1MY

5.  Martin ZS1FCN

6.  Cloe  ZR1CZ

7.  Llewellyn  ZS1VIS

Congratulations to the Eden Radio Club who managed to obtain a 100% pass rate!!

Finally:  Many thanks to all those who are/were involved in the RAE, PR and the recruiting process.  

Thursday, October 24, 2024

New Improved ZS1I ASL3 DMR Bridge - Setting up a DVSwitch Server / DMR Bridge using ASL3 (Part 2)


Image 1: ASL3 Landing Page

Now how do you install and setup an ASL3 DMR Bridge?  Million dollar question?   No there are many tutorials out there on the Internet that will assist you in installing a ASL3 DMR Bridge.  I will however explain in this article how I went about installing and setting up the ZS1I DMR Bridge on a Raspberry Pi 3 b.

For the purpose of this tutorial I am not going to explain how to install AllStarLink Ver 3 on an SD Card for use on a Raspberry Pi. The  ASL3 Landing Page includes the ASL Manual.  Click on this block or image and you will be redirected to a comprehensive online manual for AllStarLink Ver 3.  Here you will find all the necessary information to install AllStarLink Ver 3 successfully.

With regards to installing and setting up the Bridge we need to install and setup a private node, edit files, test connections to nodes, install and setup DVSwitch server, setup BrandMeister, install Apache2 Server, program DMR radio, install DroidStar on your cellphone and open ports on you Internet Router.  Do not run away it is fairly simple to get the ASL3 DMR Bridge up and running.  Having knowledge of Linux and the Raspberry Pi will make it easier to navigate through all the installations and setups. Even if you do not have experience in this regard you will be able to install ASL3 and the DMR Bridge if you follow all the instructions carefully.

Let's get going!!


 Image 2  AllStarLink3 System Manager Login


Image 3 AllStarLink3 Cockpit

I assume you already booted the PI and that you are on the Landing Page as displayed above.  (Image 1) To get to the landing page just enter the Raspberry Pi's IP address in you Internet Browser.  I use Firefox.   Click on Web Admin Portal window.  The AllStarLink System Manager page will open.  Login with your username and password.  (Image 2)

A new window will open , called the cockpit,  displaying many options. (Image 3)  At the top a banner will be displayed  - Web console is running in limited access mode.
Click on "Turn on Administrative Access".   You will now have Administrative Access.  On the left side of the page go to Terminal and click on it.  Terminal will open.  After the $ sign type:

sudo asl-menu [enter]

The asl-menu will open and here we are going to setup a New Private Node.

The AllStarLink Main Menu will open.  Select 1 Node Settings  [enter to select]

In the Node Setup Main Menu select 1 - Allstar Node Setup Menu [enter to select]

A new menu Allstar Node Select Menu will open .  Select A - Add Node  [enter to select]

Enter new node number:  I used 1980 ( Anything between 1800 - 2000.  Do not use private node number already used in other AllStarLink Nodes)

Question will appear asking:  What configuration settings should we use for Node 1980?

Select 0  None of the above (show all settings) [enter to select]

Node 1980 info will appear:

1  Node Number:  1980

2  Node Password:                (Leave blank.)

3  Node Call sign:  ZS1I   (Enter you call sign here)

4  Radio Interface:  USRP  [enter]  Select 5  USRP [enter to select]

5  Duplex Type:  Select 0  Half / Full duplex with no telemetry link -  Use  space bar to select.  Select half duplex.  Next select Back and Back again.  Select 2  Restart Asterisk  <- Needed   [enter to select]

Asterisk will restart

Node Setup Main Menu will appear again.  Select 3  Update Asterisk AMI Password

Enter to select.  If you have not changed it do in now.  I already changed mine earlier.

Select 4 Update Asterisk IAX Port.  Enter Change Port.  I used 4562 -  Ensure that this port forwarding is also opened in you Internet Router.

Exit Main Menu

Select <Back>

The AllStarLink Main Menu will open.

Asterisk must be restarted to make you changes alive.  Are you sure you want to exit now.  (Note:  Asterisk restart can be done selecting 7 Logout/Reboot/Shutdown.  Select 3)

Select Yes and [enter]

Type the following at the prompt in the Terminal

sudo systemctl restart asterisk.service  [enter]

After  restart type the following at the prompt in the Terminal   

cd /etc/allmon3  [enter]

then sudo nano allmon3.ini [enter]

Go to the bottom of the page and enter the  following:

[1980]
host=127.0.0.1
user=admin
pass= xxxxxx  ;your asterisk password we created earlier
 
Let's save the info
Hit Ctrl + X
Yes
[enter]
 
Reboot the node.  At the prompt type:

sudo reboot now [enter]

Go to Web Admin Portal (Click on Window)

Log in again 

AllStarLink System Manager will show up (Cockpit)

Turn on Administrative Access


Click on image for larger view

Let's go to the Allmon3 page

Open and Internet Browser Tab  and type

https://IP Address /allmon3/  [enter]

Browser Page will Refresh.  If not just click refresh button (reload current page)

Node 1980 has been added once the page has reloaded. We now have two nodes displayed.  AllStarLink3 Node and 1980.  

Login to Allmon3  (left side of page under nodes)

Username:  ZS1I

Password:  XXXXXX

We now need to check if node 1980 can connect to the AllStarLink3 Node you choose.

Choose the block with the two links on the right side of the Allmon3 Monitoring  Dashboard page

Select  command and select connect
Node # = 1980
Permanent = No
Click  Execute
 
The two nodes will be connected.  See Connect State.  It says  ESTABLISHED at both the nodes.

Now Disconnect by clicking on  X left to Node 1980 - Hover over it. The X will turn to a maroon colour.  Screen will come up to disconnect node.  Just click Execute.
The two nodes will now be disconnected.

It is now time to install DVSwitch.
Go to the Cockpit
Select Terminal (Click on it)
At the prompt enter:
sudo su -  [Enter]
root@asl3:~#
You now have root access.


Click on image for larger view.
 
Let's install DVSwitch:
 
At the prompt type:
wget dvswitch.org/bookworm [enter]
chmod +x bookworm [enter]
. /bookworm [enter]
apt update [enter]
apt install dvswitch-server [enter]

When DVSwitch server is finished installed reboot the Pi
sudo reboot now [enter]

Let's configure DVSwitch.
 
Log back into the ASL3 cockpit 
Select the Terminal and type:
cd /usr/local/dvs   [enter]
ls [enter]
sudo . /dvs [enter]
Go through DVS Main Menu
Select 01  Initial Configuration : Callsign, DMR ID, BM Server and AMBE
Initial Configuration  Select Yes [enter]

Callsign:  ZS1I
DMR ID:  6550119
DMR ID + 2 Digits:  655011904
Leave every thing else as default  [enter]
USRP Port  -  Select Default OK [enter]
 
Input
 
Default (Analog_Bridge.ini)
 
TX Port = 32001
RX Port = 34001
Select Yes by hitting [enter]
Select BrandMeister Server:  38 BM_6551_South_Africa
Click Enter
 
Input
 
Enter Hotspot Password:   XXXXXXXX
Hit OK
Next Menu =  Hardware Vocoder (AMBE)
Select 4  No Hardware Vocoder (Use Software  Vocoder
Input finished.  Select Yes (Processing will start)
Initial Configuration Finished
 
DVSwitch Server is up and running
Click OK and enter to go to 03 Tools Menu
Select 39  Back Return to MAIN MENU   OK [enter]

Main Menu will appear  (Menu Script V.1.61)

Select 2  Advanced. Configuration  TG/Ref Manage, Macro, DMR Networks [enter]
Select 21 Configure other stanzas - Frequency, PWR, Lat, Long, Location .....
[enter]
Input
Parameters MMDVM Bridge.ini
Press enter to select Yes
Select TX + RX Frequency 145.550 Mhz   Enter other particulars GPS Power Location etc.   Leave description as is.
Input  OK  MMDVM_Bridge  Leave URL as is.
Input URL  DVSwitch Group   Leave DVSwitch Group as is. 
OK [enter]

Finished  [enter] to go to Menu

[enter]  (End of 21)
 
Now return to Advanced Configuration Menu

Select 24  Additional DMR Networks

Look that Brandmeister is your default DMR Network
Select 2  Brandmeister  Click OK  If BM  Server not configured then select 1 and configure DMR Server

Current Setup:
server address = 6551. master brandmeister.network
PW   XXXXX
USRP Port = 62031
 
Return to Main Menu
Click Back
Go to Tools (03) in Main Menu - SD Card Etc.  [enter]
 
Select 32  Configure ini files: Analog_Bridge. ini, MMDVM_Bridge.ini files [enter]
Select 1   Edit Analog_Bridge.ini
[enter]  (OK)
Scroll down to USRP
Change to the following:
 
TxPort=32001
RxPort=34001
usrp Audio=AUDIO_USE_ GAIN
usrpGain=4.00
; usrpAGC= -20,10,100 (Close with ; in front)
tlvAudio=AUDIO_USE_GAIN
tvlGain=1.00
 
Now move up to tgTg = 9 (Change this to the TG you want to start on after every reboot)
Change txTg to = 65511 or 655 etc
Save changes now
Control X
Yes to Save
Enter
 
Go to 8  Edit DVSwitch.ini
Go to export TG = 65511
Set TG as export TG
Save changes now
Control X
Yes to Save
Enter
 
Go Back to:
Tools Menu
Go to 36 = Restart DVSwitch Services
Then 37  Reboot the Pi - sudo reboot now [enter]
Go back to Landing Page (Cockpit)  Turn on the administrative access.
Go to Terminal
cd [enter]  
 
Install Apache2 Server
 
sudo apt install php-cgi libapache2-mod-php 8.2   [enter]
Install   Yes
sudo reboot now  [enter]  Go to your Internet Browser.  Press refresh button
Refresh Internet Browser (Firefox) or enter https://IP Address/index.php/
DVSwitch Dashboard will show in the window
Your DVSwitch Dashboard is now up and running
 
Now go to allmon3
https://IP Address/allmon3/  [enter]
Login
 
User Name = ZS1I
Password = xxxxxxxx
Login
 
Connect the two nodes together
Connection State =  ESTABLISHED (Both nodes)
Once connected you can test the Bridge 
Use IAX, DVSwitch, DMR Radio or Droidstar to test the Bridge
The ASL3 DVSwitch Bridge should be up and running working both ways.  Analog - Digital - Analog 
(AllStar / Echolink - DMR - AllStar / Echolink)
 
Congrats you successfully installed the ASL3 DVSwitch DMR Bridge.

NOTES:  Changing Talk Group (TG) without any hassle:

Go back to the AllStar3 Login (Cockpit)
Go to Terminal 
sudo /opt/MMDVM_Bridge/dvswitch.sh tune 655 [enter] (This command will change the talk group to 655)
 
Key-up on AllStar and it should send the audio  TG 655 (SA DMR Talkgroup)
Go to the DVSwitch Dashboard
Key-up your analog radio which is connected to AllStar
Target will change to TG655 = SRC to NET
Key-up your DMR Radio TG655 and it will show TG655 = SRC  TO LNET
 
If I reboot the node it will go back to the default TG 65511 (ZS1I Talk Group) as set in Analog_Bridge.ini
If you do not want to reboot the node just change the TalkGroup (TG) back to 65511 using:
 
sudo /opt/MMDVM_Bridge/dvswitch.sh tune 65511 [enter]
 
Go back to DVSwitch Dashboard.  Key-up AllStar Radio and your DMR Radio. Dashboard will select TG as 65511
 
Easy as Pi to change a Talk Group. (TG)

And this is how I installed the ZS1I ASL3 DMR Bridge for use by fellow radio amateurs or install and setup your own ASL3 DMR Bridge.
 
Enjoy!! 
 

Compiled by:


Johan ZS1I
Mossel Bay
24 October 2024


Tuesday, October 22, 2024

New Improved ZS1I ASL3 DMR Bridge now up and running in the Southern Cape (Part 1)

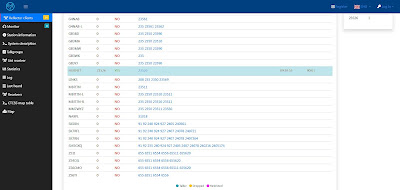
Image:  The ZS1I ASL3 DMR Bridge connected to the Allstar 49355 ZS Hub Network  (Click on image for larger view.)

On Thursday, 8 June 2023 the following article was published on this Blog:

NEW!! - DMR Bridge now Active on the Garden Route Hub Network.

Several more articles followed:

(1)  The GRHub Network, Mossel Bay now provides Inter-Linking Radio Services

(2)  Another way to use Digital Radio Modes if you do not have an RF Radio = DroidStar 

(3)  ZS1I DMR Bridge now permanently linked to the GRHub Network, Mossel Bay

(4)  DMR Bridge now active in the Garden Route Area and "test driven" by Majorke ZS5V from KZN.

From publishing the first article, it is now more than a year ago that I setup the ZS1I DMR Bridge.  Lot's of things can change in a year with regard to DVSwitch and AllStarLink.  The bridge that I installed and operated in the Southern Cape was working great but with one flaw.  The audio quality had a robotic sound to it which many do no like but as we all know we are talking about DMR here.  I enjoy keeping up to date and was constantly looking to improve the audio quality of the then  ZS1I DMR Bridge.  Three days ago I found the latest information on how to setup a DVSwitch Server for AllStarLink Ver. 3.  I chose to use this "setup" for the new  ZS1I ASL3 DMR Bridge in Mossel Bay.  Well this is what I had been looking for.  The audio quality is absolutely far better than the old bridge audio quality.  It also has several new features but more on this in Part 2.

Below:  Here is a short audio sample which I recorded while Richard ZS5RMN was talking on DMR to AllStar using DroidStar.

Below: Here is a short audio clip listening with my DMR radio on the UK HubNet.  AllStar to DMR using TYT MD380 Radio.

I am sure you will agree that the audio quality is now up to standard and far better now than what it has been in the past.

ZS1I ASL3 DMR Bridge activity on the ZS Link Hub Network : 

The AllStar-Echolink-DMR Bridge is now active on the ZS Link Hub Network, Mossel Bay and is also available to all the ZS-Link Network users. (To many to mention them all here.)  Now what is this all about?

It is quite simple.  When the Bridge is active it connects the following applications/nodes together which is forming  a "Bridge".  Simply put it allows one person to talk on Echolink and the conversation will be propagated to AllStar and DMR and vice versa.  

This bridge has been a useful addition to the ZS Link Network.  It is now permanently linked to the network.  The ZS1I DMR Bridge is now the gateway to some who cannot afford to buy a digital radio, hotspot etc or might "want to get their feet wet first."  There are ways and means to use DMR and other digital radio modes without  a radio or hotspot.  I indicated before that you can use your analog VHF/UHF radio to work digital radio modes via the ZS1I ASL3 DMR Bridge (TG65511).  I am so grateful to those who made this possible by writing software and creating applications for this purpose.

Anybody that are connected to ZS1I-R Echolink or 49355 AllStar will be automatically connected to   the ZS1I ASL3 DMR Bridge (TG 65511) and can make a contact on DMR either by using a DMR Radio, DroidStar, 2m Analog RF Radio, Computer or Cellphone. The Bridge allows radio amateurs that do not have a digital radio to make contact with DMR stations via the equipment mentioned above, whichever they have available.

I trust that the ZS1I ASL3 DMR Bridge will be of use to radio amateurs who would like to learn more about DMR and the use of this facility.  It definitely open up new doors and adventures in the world of digital voice radio using analog radios.

Enough for now.

Finally:  I would once again like to invite clubs and radio amateurs to use and keep on using the ZS-LINK and GRHub Network if they so wish. The ASL3 DMR Bridge network is not a private, club only or special allocated network venture.  It is open for general use by any radio amateur.  Start or join a QSO on DMR and make new friends.

In Part 2 we will be looking at how to install and setup this ASL3 DMR Bridge on a Raspberry Pi and connect it to BrandMeister, AllStar, Echolink, DMR TalkGroups and other digital voice radio "mode'.

Thank you to those who support and use the ZS-Link Network regularly.  Highly appreciated!!

Monday, October 21, 2024

Opvolg: Ope Vraag - Is Suid Afrikaanse Innovasie in Amateur Radio dood?


In die uitgestrekte landskap van tegnologiese vooruitgang is daar ontelbare onbesonge helde wie se bydraes 'n diepgaande impak op die moderne wêreld gehad het. Onder hulle staan ​​amateurradio-operateurs hoog as pioniers van innovasie op die gebied van kommunikasie. Van die vroeë dae van morse kode tot die era van digitale seinverwerking, het die innovasies wat deur amateurradio-entoesiaste aangedryf word, 'n onuitwisbare merk gelaat op die manier waarop ons vandag verbind en kommunikeer.

As jy Amateur Radio op die hart dra luister dan gerus na die klankgreep.  Ja hy is 29 minute lank maar dit behoort hopelik jou uitkyk tov innovasie in amateur radio ingrypend te verander. 


Lys van Suid Afrikaanse Innovasie in Amateur Radio (Slegs 'n paar voorbeelde hier genoem. Ek glo daar is nog talle ander maar laat die spasie en tyd my nie toe om almal te noem nie.)  Klik fotos om te vergroot.

1. 2024 ASATSA Space Symposium - 19 October 2024 

Speakers at the Symposium:

1.1  Hans van de Groenendaal ZS6AKV
1.2  Hennie Rheeder ZS6ALN
1.3  Gary Immelman ZS6YI
1.4  Jon Ward SANSA Hermanus
1.5  Burns Fisher WB1FJ AMSATNA
1.6  Anton Janovsky ZR6AIC

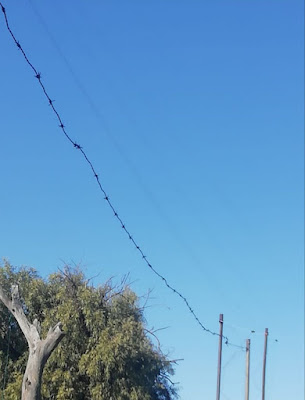
 2.  HF Doringdraad Antenna -  Christi ZS4CGR  


3.  Repeater Anti-Theft Alarm - Christi ZS4CGR


4.  SA Digital Voice Network Innovation - Curtis ZS6CMO + Johan ZS1I


5.  AMSAT SA Dual band 70cm/yagi Mark II - Gary Immelman ZS6YI (ZS Oct. 2024)


6.  HAM Challenge 2024 IARU Region 1


7.  'n Eindelose Antenna - Christi ZS4CGR (ZS Okt. 2024)


8.  Baofeng and Barbed Wire Activity - Brian Jacobs ZS6YZ  (ZS Oct. 2024)


9.  2025 Tinus Lange 7066 Technical Excellence Award - Radio ZS October 2024

10.  BACAR Flies Again - ZS6SRC - Guy Eales (ZS Sept. 2024)  

11.  Converting a Ham4 Rotator into a super Rotator - Mat Erasmus ZS6PEG (ZS Sept. 2024)


12.  First SKA-Mid Dish takes shape in South Africa - Engeneering IT  (ZS Sept 2024)


13.  QRM Noise Canceller - Improved RFI Cancelling - Warren Ackerman ZS6AKW  (ZS Sept 2024)

14.  Personal Account of the rescue of SV Petra - Jakes van Zyl ZS6JJZ (ZS Aug. 2024)


15.  The Cool - Log Book Program - Eddie Leighton ZS6BNE


16.  First Annual Queens of the Mountains - Adele Tyler ZS5APT (ZS July 2024)


17.  Gauteng Kon-Tiki 2024 -  Nigel ZS6RN  (ZS July 2024)


18.  The YL Beam - Heather Holland ZS5YH (ZS July 2024)


19.  Jules Fejer - Engineer and theoretical physicist   - Brian Austin ex ZS6BKW (ZS July 2024)


Thursday, October 17, 2024

Ope Vraag - Is Suid Afrikaanse Innovasie in Amateur Radio dood?


Hendrik Johannes van der Bijl (23 November 1887 – 2 December 1948) was a South African electrical engineer and industrialist and is regarded as one of the greatest South Africans for his contribution to the country's development.  More information on this remarkable South African available HERE

Betekenis van innovasie = Innovasie is die praktiese implementering van idees wat lei tot die bekendstelling van nuwe goedere of dienste of verbetering in die aanbieding van goedere of dienste. Die definisie van  innovasie is "'n nuwe of veranderde entiteit wat waarde besef of herverdeel". Ander het verskillende definisies; 'n algemene element in die definisies is 'n fokus op nuutheid, verbetering en verspreiding van idees of tegnologieë.   As jy Amateur Radio op die hart dra luister dan gerus na die klankgreep.  Ja hy is 28 minute lank maar dit kan jou uitkyk tov amateur radio ingrypend verander. 

Wednesday, October 16, 2024

Ham Dashboard a great tool for Radio Amateurs


A couple of days back I decided to test the above dashboard a single page application written by VA3HDL It is free and open source in case you wanted to add it to a PC monitor in your radio room.  This is absolutely the best software addition to my Shack.


The files are available on GitHub and it is super easy to install and get the application up and running.  I am not going to go into detail regarding the installation and setup here as the following useful links will get you up and running.  I am currently running the application on Linux Mint using the Mozilla FireFox Browser and have not experienced any issues.  This program also runs on Windows using the Google Chrome Browser and also on a Raspberry Pi.

Here is a few useful links and a short instruction how to setup and run the application:

 
Instructions:
 
1.   Just download the files from the Github repository (hamdash.html, config.js, and wheelzoom.js) and keep them together on the same folder.
2.  Open hamdash.html with any browser of your preference and you done.
3.  With any text editor (like Notepad) you can change the source images (can be more than one per box) or the menu options from the config.js file.

I am currently using the following 12 Dashboard Windows ("source images") in my application:

1.  VIS Satellite Image (WX Image for South Africa)
2.  Seismic Activity (World Wide)
3.  NOAA D-Rap (World Wide)
4.  ISS Tracking  (Mossel Bay KF15bt)
5.  Rainfall Prediction (South Africa)
6.  Hepburn Propagation Charts  (South Africa)
7.  Cyclone Probability  (World Wide)
8.  Airmass Satellite Image  (WX Image for South Africa)
9.  Grey Line Chart (World Wide)
10  Cape Town Web Cam (South Africa)
11.  Mossel Bay Airfield Web Cam (South Africa)
12.  HF Propagation Charts  (World Wide)
 
A few notes:
 
I saved Hamdashboard under my Bookmarks and this is how I open the application
To start Hamdashboard
Open Firefox Web Browser
Click 3 lines top right hand corner of Firefox
Select  VA3HDL Ham Radio Dashboard under your Bookmarks

Another method to start Hamdashboard is to go to the Downloads Folder
Click on hamdashboard-main
Right click on hamdash.html
Select Open with Firefox Web Browser
Hamdashboard will open in your Firefox Web Browser

To edit any of the 12 Dashboard Windows ("source images")
Go to Downloads Folder
Click on hamdshboard-main
Right Click on JS - config.js
Select Open with Text Editor
File will open and you can now edit the file only after you made a backup of config.is.  Remember backup! 

Quick Help:

1.  Double click on an image to expand to full screen.
2.  Double click again to close full screen view.
3.  Right click on an image to display the next one. (In the latest version is possible to add multiple images per box.)
4. The content refreshes automatically every 5 minutes.

Finally:  It is a great application and really of great assistance to me in the Shack as I do not have to open various tabs in my browser.  Furthermore this is a "single page application" that runs on Mozilla Firefox  independently of the operating system.
 

Images  (Click on images for larger view.)


Tuesday, October 15, 2024

Down Memory Lane: ZS1I 2008 and 2011 ARISS SSTV Historical Archive


In the previous post you can read all about the 2024 ARISS  Series 21 SSTV Experiment.   Click HERE

I wanted to submit two images that I downloaded from the ISS.  When I entered my call sign I was amazed to find archived images that I submitted in 2008 and 2011.  Now what makes this so special you would say?

No I did nothing special but there is a fair amount of history now involved in the images I downloaded in 2008 and 2011.  Let's take a closer look.

ISS SSTV Images during the 2008 Richard Garriot 1 Mission:

In 2008 I downloaded 3 images from the ISS on the 17, 18, 19 October 2008 during the Richard Garriot 1 Mission.

Richard, the son of NASA astronaut Owen Garriott, became the second space traveler, to have a parent who was also a space traveler. On October 12, 2008, he flew aboard the Soyuz TMA-13 mission to the International Space Station as a space tourist (sixth private astronaut to live aboard the ISS), returning 12 days later aboard Soyuz TMA-12.

Richard is an avid explorer, having traveled around the globe from the jungles of the Amazon to the South Pole, the deep seas of the Titanic and hydrothermal vents to orbiting the earth aboard the International Space Station, and most recently to Challenger Deep, the deepest point in our Oceans. He currently serves as the President of the Explorers Club, the first explorer to have explored pole to pole, orbited the Earth, and reached the deepest point in the Ocean.

During his spaceflight, Garriott took part in several education outreach efforts. The free Metro newspaper in London provided him with a special edition containing details of British primary school students' space experiment concepts that Garriott took to the ISS. The Metro has claimed, as a result, that it was the first newspaper in space. He communicated with students and other Amateur Radio operators and transmitted photographs using the Amateur Radio on the International Space Station (ARISS) slow-scan television system, and placed a geocache while aboard the ISS.

Images I downloaded :  Click on images for larger view.


Submitted by: Johan, ZS1I, Africa
Acquired: 2008-10-17 17:49:00
Mission: Richard Garriott 1

Submitted by: Johan, ZS1I, Africa
Acquired: 2008-10-18 18:16:00
Mission: Richard Garriott 1

Submitted by: JOHAN, ZS1I, Africa
Acquired: 2008-10-19 17:06:00
Mission: Richard Garriott 1

2011 ARISSAT-1 SSTV Images on the 50 th aniversary of Yuri Gagarin's first manned space flight:

In 2011 I downloaded 1 image from the ARISSAT-1 Satellite on the 7 August 2011.  At the time of downloading the satellite was rotating less and the images were getting much cleaner. Here is the image I downloaded.


Submitted by: Johan Terblanche, ZS1I, Africa
Acquired: 2011-08-07 16:29:00
Mission: ARISSat-1_Aug_2011

Now what is interesting about this image?

On the 13 April 2011 it was reported that the ARISSat-1 satellite will be deployed in celebration of the 50th anniversary of Yuri Gagarin's first manned space flight.  Roscosmos has announced that the satellite will be deployed into orbit during the next EVA in late July of this year (2011).  ARISSat-1 was deployed at 1843 UTC by Sergey Volkov on the 3 August 2011.

ARISSat-1 is a new Amateur Radio satellite that was deployed from the International Space Station (ISS) during a space walk.

Amateurs were able to communicate through it’s linear transponder using SSB/CW and receive it’s FM, BPSK and CW downlinks. The FM downlink also transmitted Slow Scan TV that was received using the free MMSSTV software.

The amateur radio satellite ARISSat-1, fell silent on Wednesday, 4 January 2012, as it re-entered the Earth’s atmosphere."

I am privileged to have downloaded the above SSTV image from ARISSAT-1 with the call sign  RS0IS.

Final Comments by Johan ZS1I: 

Now why would one write an article about yourself and also about a experimental project that was undertaken in 2008 and 2011?  

1.  Definitely not to brag or boast about it at my age as it is rather late to look for attention now.  Those who know me will know that I am not an attention seeker. Neither do I enjoy to be in the limelight.
2.  One reason is the above mentioned events are now historically and forms part of my series of articles called "Down Memory Lane" that I publish on the ZS Link Network Blog to save it for future generations.
3.  Another and very important reason is that I am getting on in the years and this article serves to inform the younger generation that they have a responsibility to assist ARISS with experimental projects.   ARISS lets students worldwide experience the excitement of talking directly with crew members of the International Space Station, inspiring them to pursue interests in careers in science, technology, engineering and math, and engaging them with radio science technology through amateur radio.   More information about ARISS is available HERE.  (Worthwhile the read) 
4.  This article should be an example to the younger generation in Amateur Radio that there is always an opportunity to learn and experiment more.  We as Radio Amateurs have the resources to assist with space exploration.  I would like to see that radio amateurs increasingly become involved in ARISS projects.
5. I trust that this article will kindle and energize radio amateurs anew to get involved in future space experiments, projects and thereby also contribute to amateur radio space history.
 
Johan Terblanche ZS1I
Mossel Bay
15 October 2024


Can one see Auroras (Southern Lights) in South Africa?

Aurora Australis (Southern Lights) over Simons Town. Picture: Hassaan Tanvir During a recent discussion on the "Sonsak Span Amateur Rad...